Software Installation
To install Cosnim, you need to:
Install a FUSE driver
Download the Cosnim software
Install/expand the software
Check the installation
Install Finder Quick Actions (optional)
Enable Docker (optional)
Install FUSE
Install a FUSE package according to your OS:
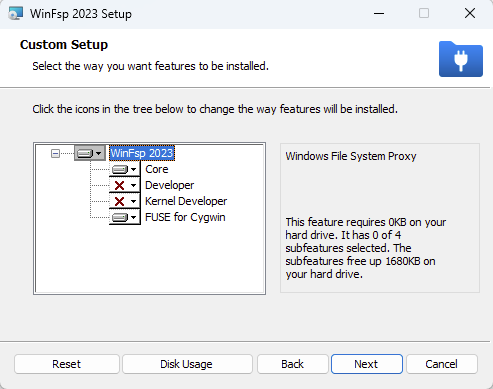
To install a FUSE driver on Windows, install WinFsp from https://winfsp.dev/rel/
Make sure to select the “FUSE for Cygwin” option during installation:
To install FUSE on a Debian-based Linux system, use the apt packaging system:
apt install fuse
To install FUSE on a RedHat-based Linux system, use the yum packaging system:
yum install fuse fuse-libs
To install FUSE on a MacOS system, install the OSXFuse (aka MacFuse) package from:
https://osxfuse.github.io (aka MacFuse)
Note: MacFuse may require you to enable MacOS kernel extensions to complete the installation on more recent versions of MacOS. This is only needed if you intend to mount a continuum as a filesystem to store live data or to explore Time-Travel through the OS & Finder. For a simple example of how to enable kernel extensions on more recent machines, see https://www.makeuseof.com/how-to-enable-third-party-kernel-extensions-apple-silicon-mac/.
If you’ll be running Cosnim within containers, also see Authorize Docker Containers for special authorizations you may need to give to these containers to mount live filesystems.
Download the Cosnim software
Download from https://downloads.cosnim.com the installation package appropriate for your OS and platform. You’ll need the username & password that was sent to you by email to access the downloads website.
Install/expand the software
Double-click on Cosnim’s msi installer and follow the instructions.
Afterwards, you should create a ‘cosnim’ directory at a location of your choosing to hold the configuration files, capsules and mounts for a given continuum. For more information, see Quick Start.
Installation consists of expanding the downloaded tarball.
If you’re installing Cosnim for a single user, you should first create a ‘cosnim’ directory and expand the software in a ‘bin’ subdirectory. This will help later on when configuring and running Cosnim from a single location:
mkdir -p cosnim/bin

tar -xf Cosnim-0.4-Preview.8-Debian.10-Build.xxxx.tar.gz -C cosnim/bin
Once the tarball is expanded, the entire software is fully installed.
Check installation
To check that Cosnim can run properly on your machine, run the cosnim --version command.
Open a Command Prompt and run the command:
cosnim --version
Open a terminal session and first update the current PATH to include the installed software:
. <installation_location>/activate
Then run the command:
cosnim --version
Install Finder Quick Actions (MacOS)
When running under MacOS, you should install Cosnim’s Finder Quick Actions to make it easy to explore Time-Travel directly from the Finder (highly recommended). To do so:
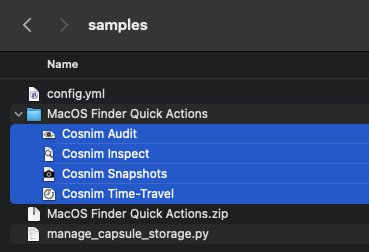
From the Finder, open the ‘samples’ folder under the ‘bin’ directory where you installed Cosnim.
Double-click the file ‘MacOS Finder Quick Actions.zip’. This will expand the zip file.
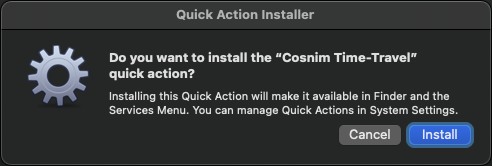
Select and double-click all the actions found in the ‘MacOS Finder Quick Actions’ folder.
Click OK when prompted by MacOS to confirm the installation of the actions.
Note
MacOS automatically removes the quick actions from the installation’s directory during installation. If you need to re-install the actions, repeat the above instructions to re-expand the zip file.